Add Board

Written by Bill Wolff
Updated at March 7th, 2025
Purpose |
Easily and quickly add a board to the interior or exterior of a truss profile. You can also specify the type, size, species, and alignment. |
Prerequisites |
An existing truss |
|
Steps
|
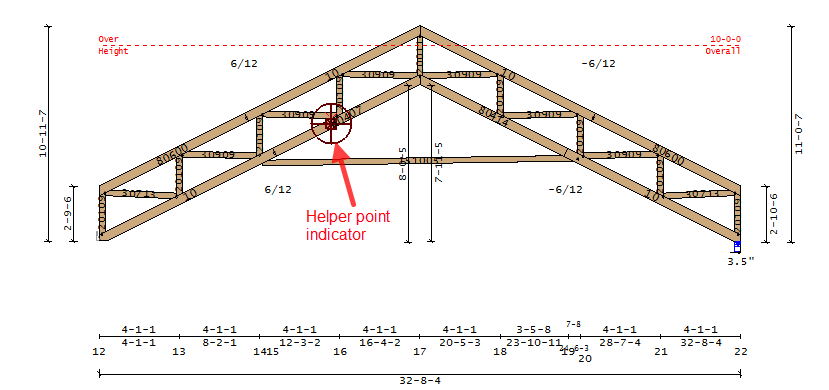
1. From the Operations menu, select Add Board or click You are prompted to select the first point on the truss. The following prompt displays: Before selecting the first point, you can use the R key to define a "helper point." Note: Make sure the Caption Bar, on the Applications menu, is turned on so that the prompts for each step are visible. 2. Select the first point on the truss. If you press the space bar prior to selecting a point, the Offset dialog displays. The following prompt displays:
3. Select the second point on the truss. Note: To create a helper point, pick an arbitrary point using Shift-left click. A sample with two points selected is shown below.
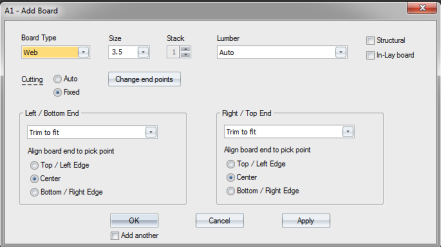
After the second point is selected, the Add Board dialog displays.
Board Type
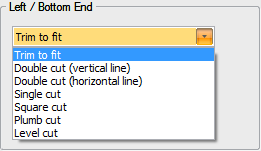
Size - select the board size from the drop down list. Stack - 1 is the default; up to 6 stacked pieces are allowed Lumber
Structural - select this to add a structural board which is included in the analog model In-Lay Board - add a new board between two existing boards. New boards input across existing boards are cut to the edges of intersecting members and do not overlap. When this option is unchecked, new boards input across existing boards will not be cut to the existing boards and instead will overlap. Cutting
Change End Points - temporarily closes the Add Board dialog and allows re-selection of the start and end points of the new board. Add another - check this box to keep the Add Board dialog open and continue adding new boards 5. Click Apply to add the board to the truss and keep the Add Board dialog open. Click OK to add the board and close the dialog (unless Add another is selected). You can apply loads to newly added boards using the Component Loading dialog. Examples Two common situations where this feature is helpful include:
|
| Related Topics |

 .
.

 Note that before selecting the second point, you can use the following modifier keys to aid in defining the point.
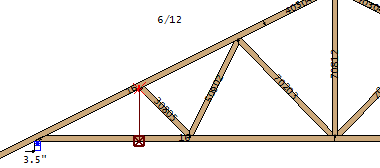